Question fréquemment posée
Using the Dashboard - Pickups/Returns
Dernière mise à jour il y a 4 ans
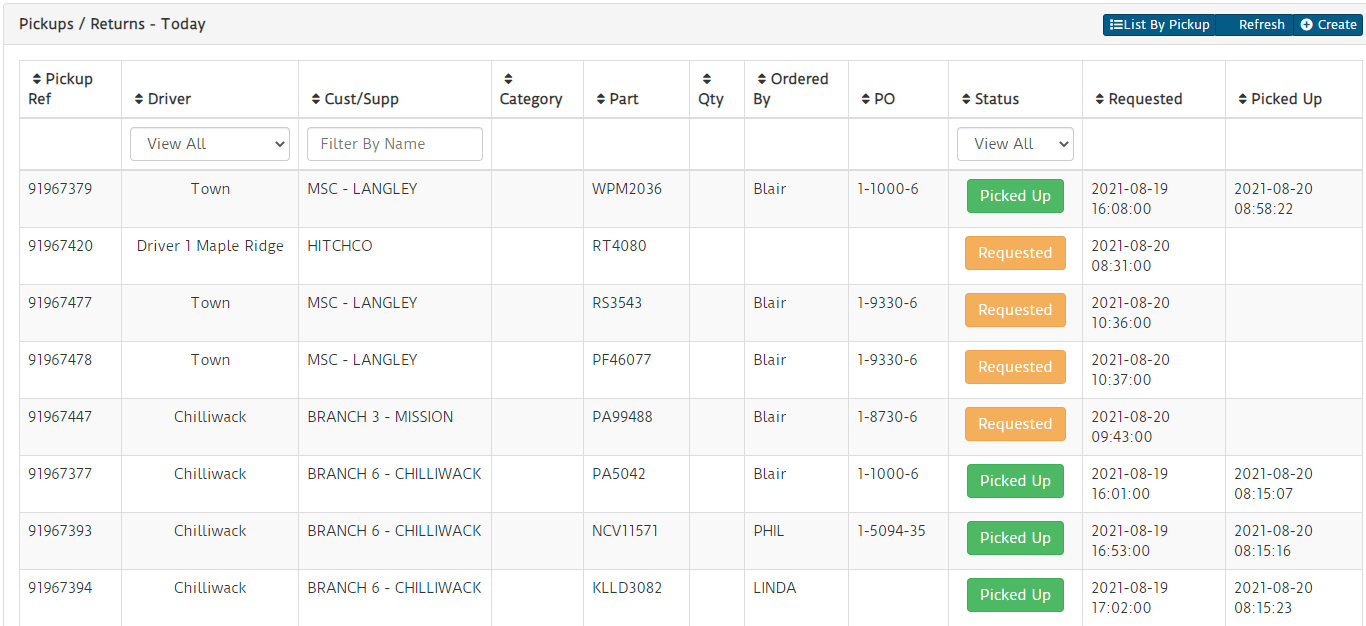
Pickups / Returns
Overview
This tab shows a listing of all outstanding pickups and allows you to create pickup requests. Pickups are used only within the jDispatch module at this time, and are a useful way to keep your staff informed of the status of warehouse pickups as well as keep tabs on core & warranty returns from customers.
Creating A Pickup
- To create a pickup request, click the Create button in the top right corner of the Pickups / Returns - Today panel.

- Once clicked, the Add New Pickup Request modal will show
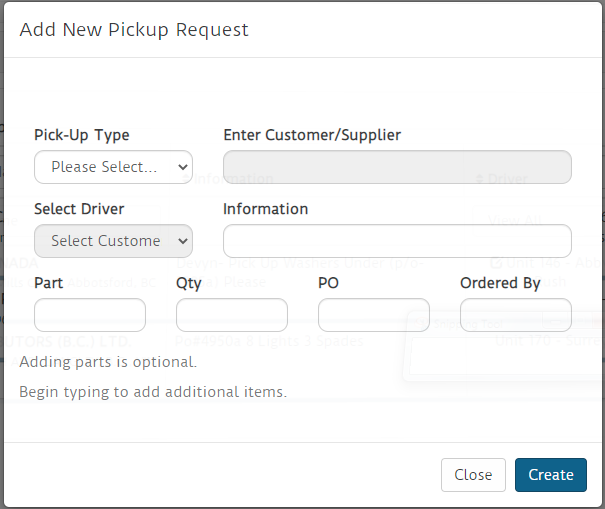
- Start by selecting the type of pickup (Customer or Supplier/Warehouse), then select the customer or supplier they should be visiting. To pick a customer or supplier, begin typing in the name. A number of options should start to display. Once the one you wish to select is visible, just click on their name.
- If it is a customer pickup and there are any drivers currently assigned a delivery to that customer, that driver will be automatically selected as the driver. You can change this. If there are no drivers currently scheduled to deliver products to this customer, please select a driver to assign the pickup to.
- In the information field, type in any notes you want to be visible to the driver when they view the pickup request on their phone.
- If there are specific parts to be picked up, you may enter them in the Items to be picked up As you type in the first field, another part field will appear.
- Clicking the Create button at the bottom will finalize the pickup request and send it to the selected driver. It will also appear in the pickup listing table

Adding items to a pickup request
Once a pickup is created, you can add additional items to the pickup request via the pickup listing
- Click the expand down button next to the pickup you want to add to
- Enter in part information such as part number, qty, PO and who is requesting the item
- Click the green plus symbol button to the right of the part entry row
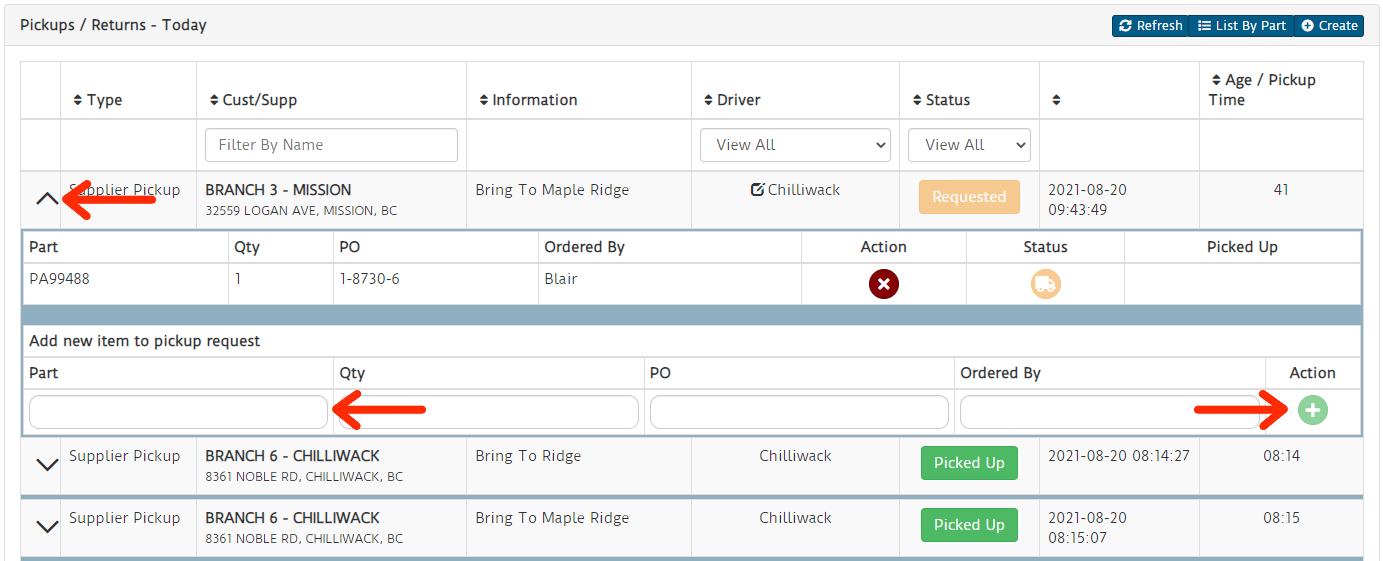
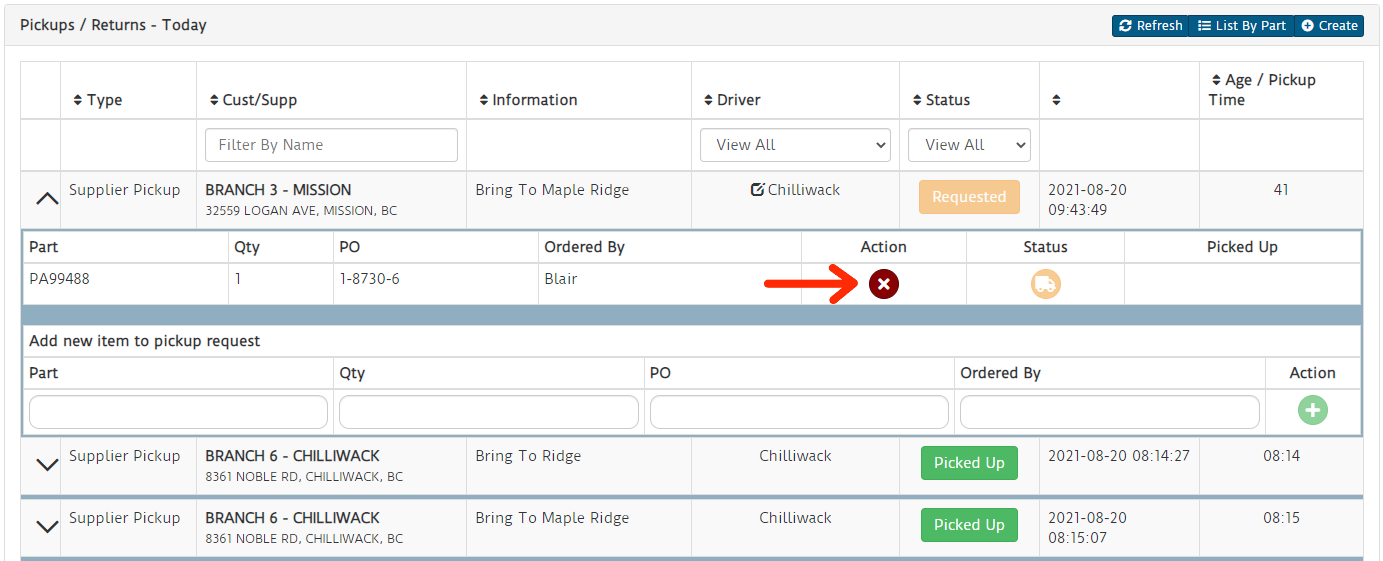
Removing items from a pickup request
Once a pickup is created, you can remove items from the pickup via the pickup listing
- Click the expand down button next to the pickup you want to add to
- Click the red X button next to the item you wish to remove
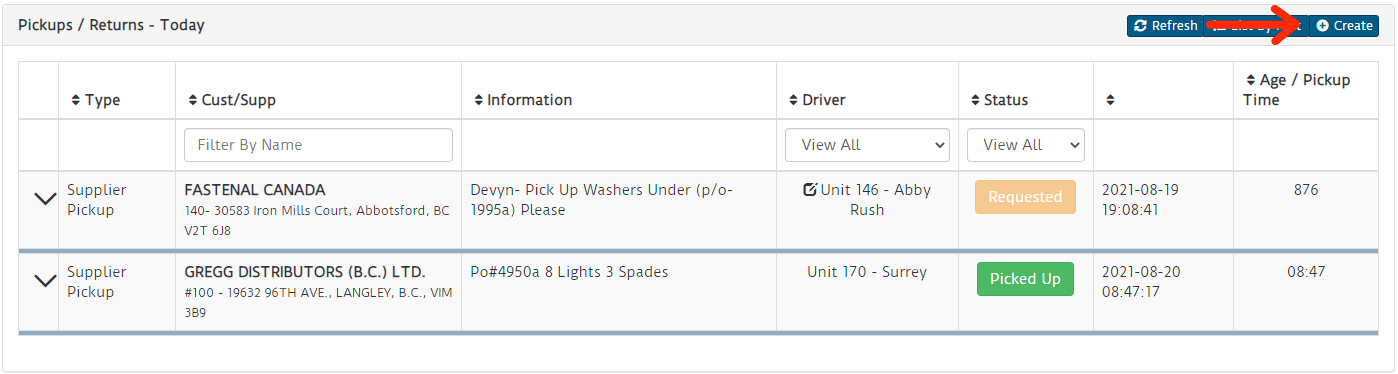
Change driver assigned to pickup request
Any pickup requests that have not been completely confirmed can have the assigned driver changed
- Click the edit icon next to the driver's name on any delivery you wish to change

- This will present you with a drop-down of drivers to select. Once you select a driver, the pickup request will be transferred to that driver, and their device will receive a notification of the change

View Pickups by Part number
You can optionally change the view of pickup requests to view the requests by part number in case you have a part number specific question you need answered.
- Click the List By Part button in the top right of the Pickups / Returns - Today panel

- This will change the pickup panel view to list the requests by part